
A MetaMask wallet, which is required for the token distribution, is a web-browser plugin wallet that connects to most Web3 interfaces and is widely used to interact with the Binance Smart Chain and Ethereum.
Installing and setting up Metamask
MetaMask can be downloaded on Chrome and Firefox, or on iOS and Android. For this tutorial, we’ll use the Firefox version, but the instructions will be more or less the same for every platform.
Firstly, head over to the MetaMask Download page. From there, select the platform you’re using, and follow the steps to install it on your device.
Next, follow along with the setup specified by the app. Go ahead and click Create a Wallet. Write down the backup seed phrase somewhere secret (preferably not on an Internet-connected device). Without this phrase, your funds can’t be recovered if your device is damaged or lost. Confirm that you’ve written them down on the next page. You should now see your wallet, ready to send and receive funds.
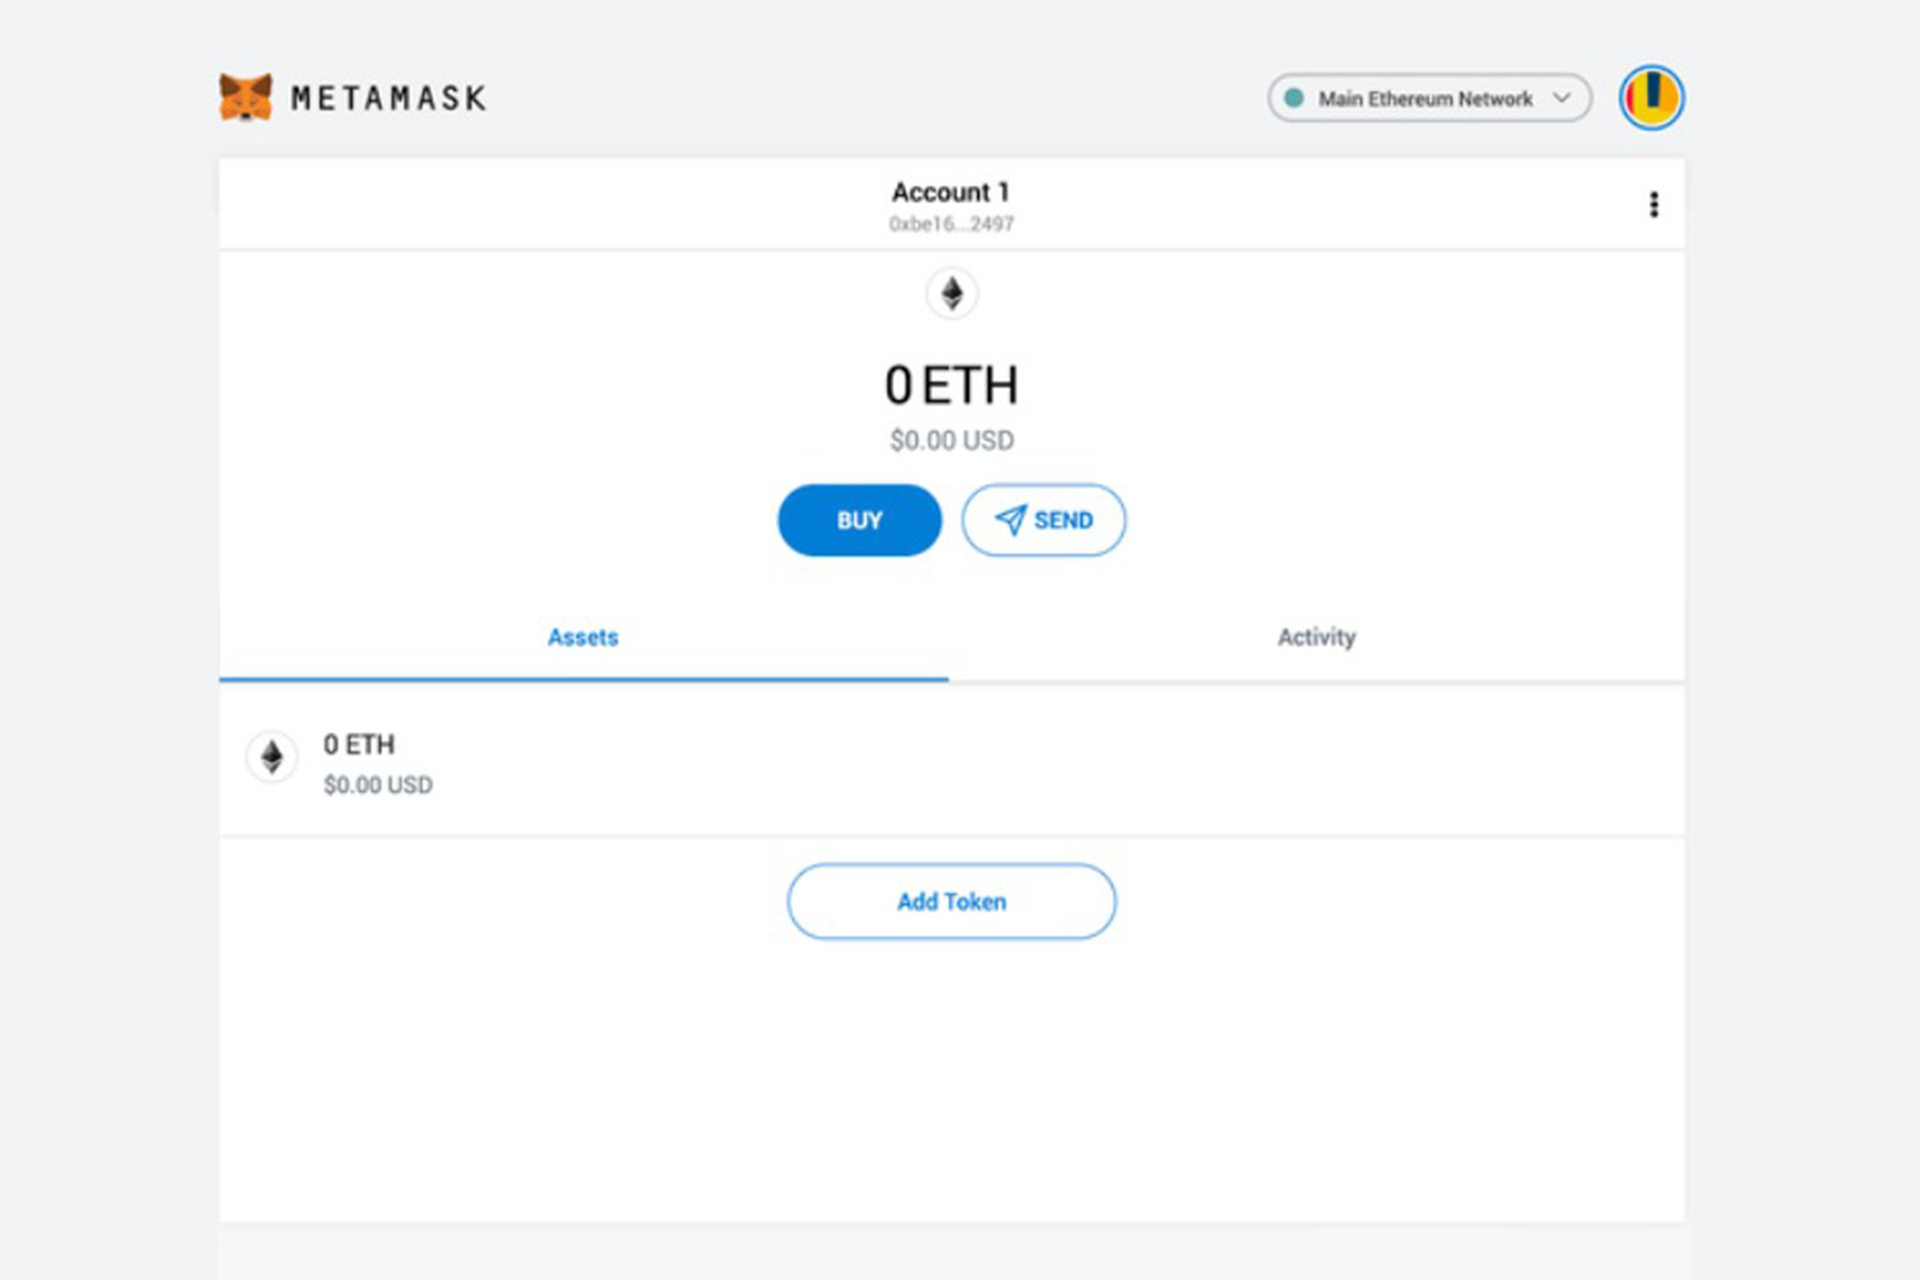
You might notice straight away that we’re still dealing with an Ethereum wallet. Let’s change that to a Binance Smart Chain wallet.
Configurate the wallet for Binance Smart Chain Wallet
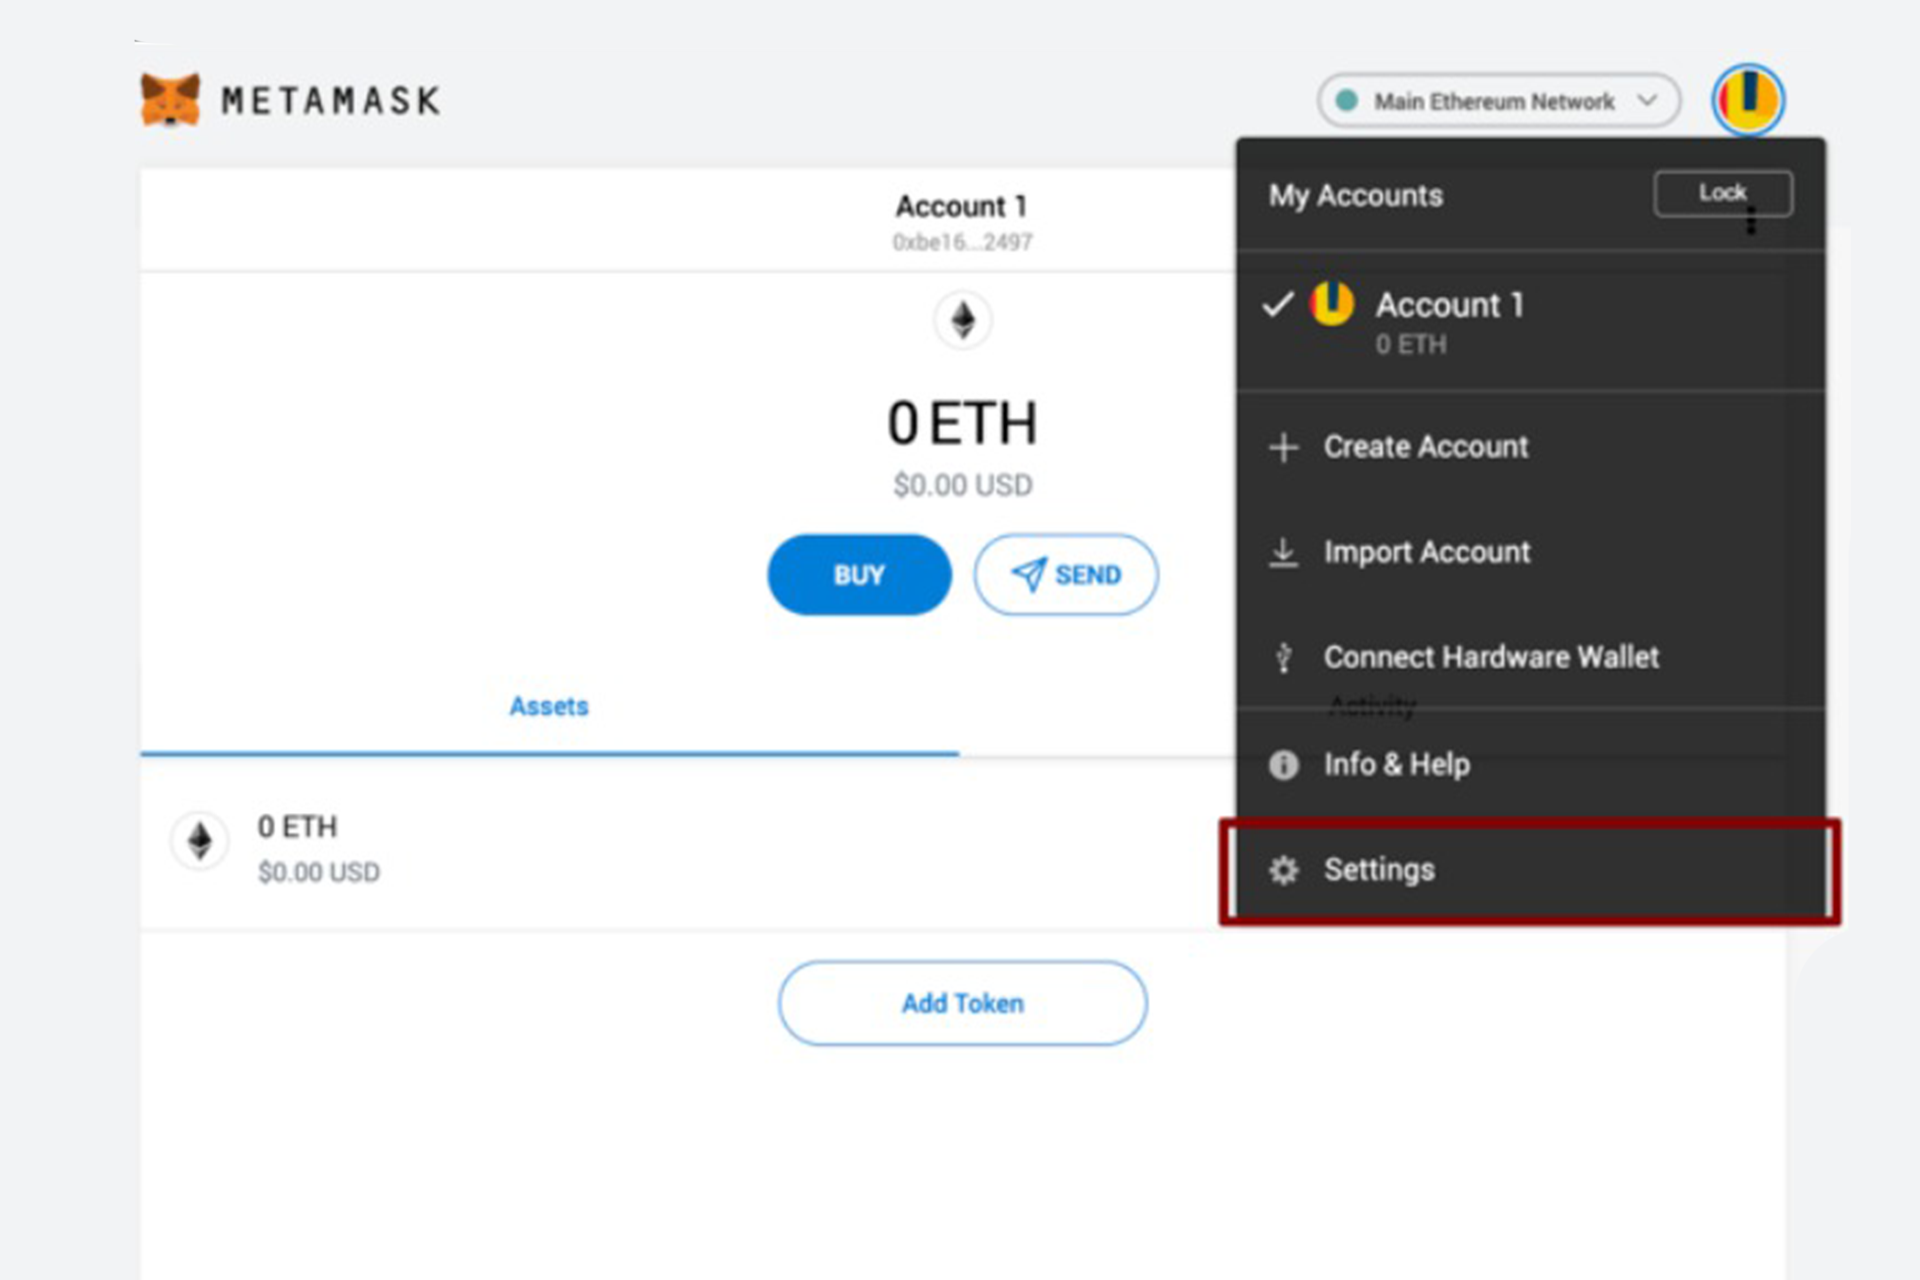
We want to access the Settings to point the wallet towards Binance Smart Chain nodes.
On the Settings page, we want to locate the Networks menu.
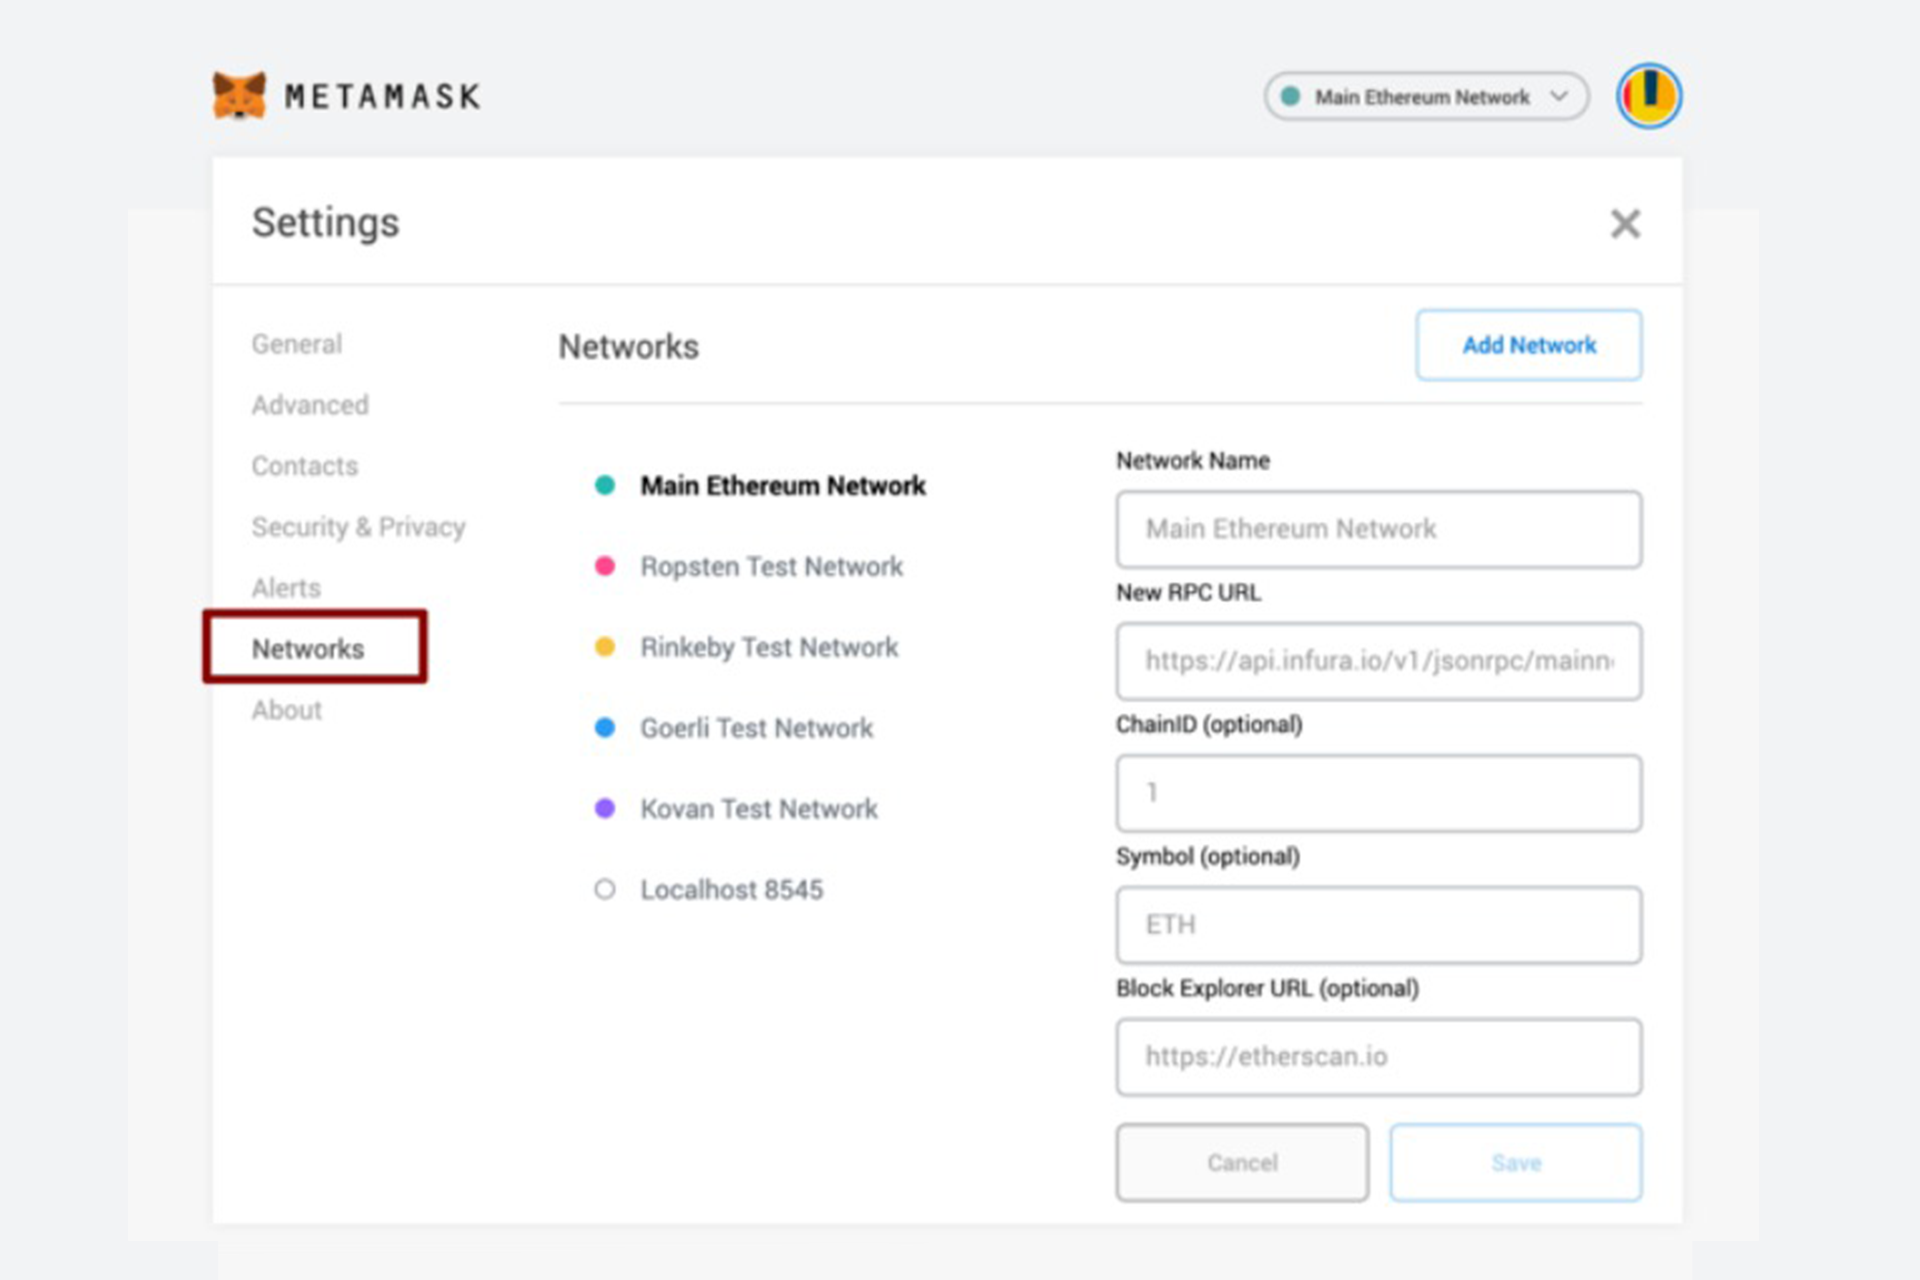
We want to click Add Network in the top-right corner to manually add the Binance Smart Chain one — it doesn’t come packaged with MetaMask. It’s important to note that there are two networks we can use here: the testnet or the mainnet. Below are the parameters to fill in for each.
Mainnet (This is the one you are want to look at!)
Network Name: Binance Smart Chain
New RPC URL: https://bsc-dataseed.binance.org/
Block Explorer URL: https://bscscan.com/
Enter the Mainnet’s Detail like this:
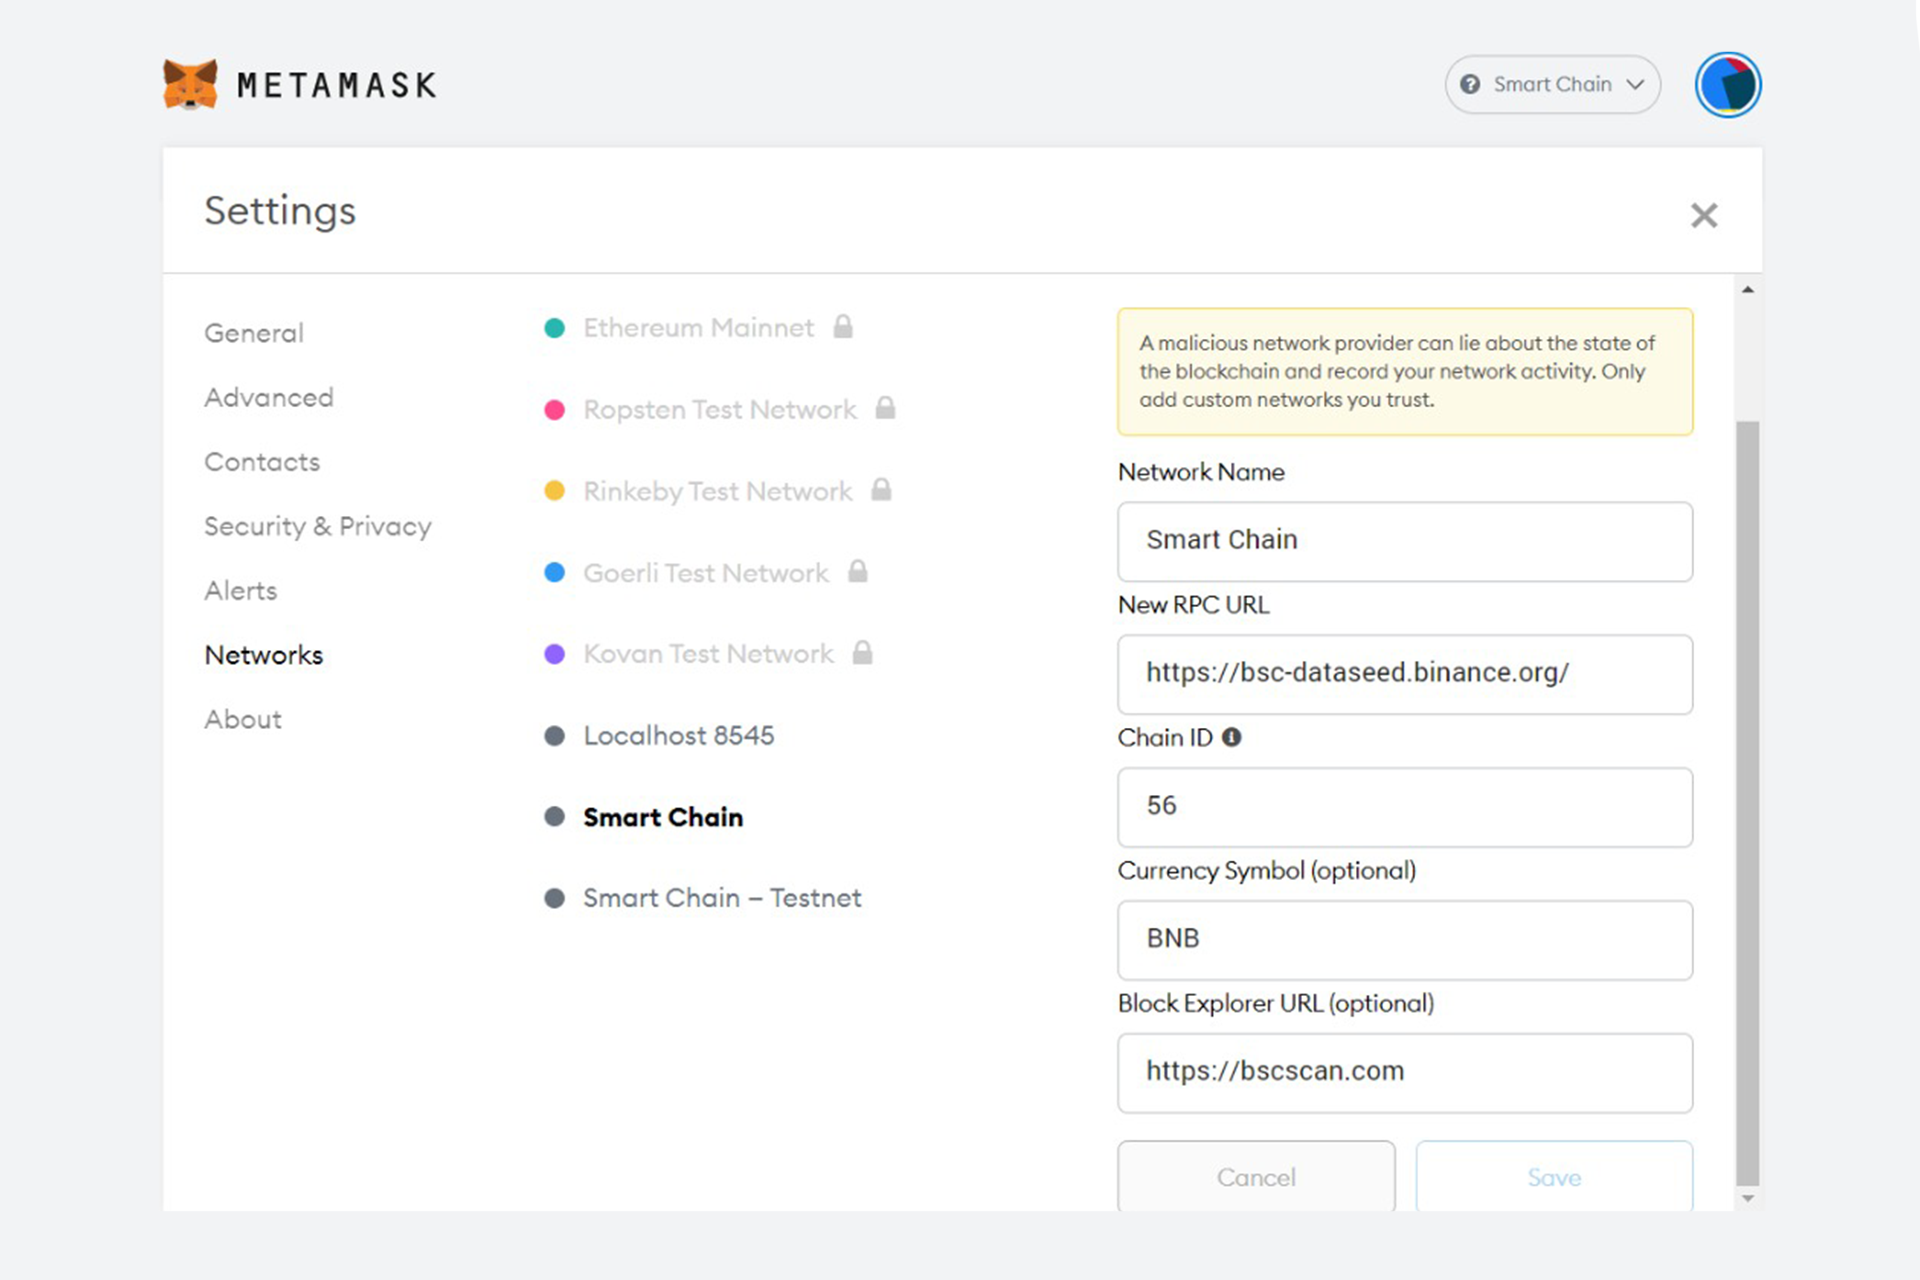
Click Save.
You have now connected to the BSC mainnet with your Metamask Wallet.